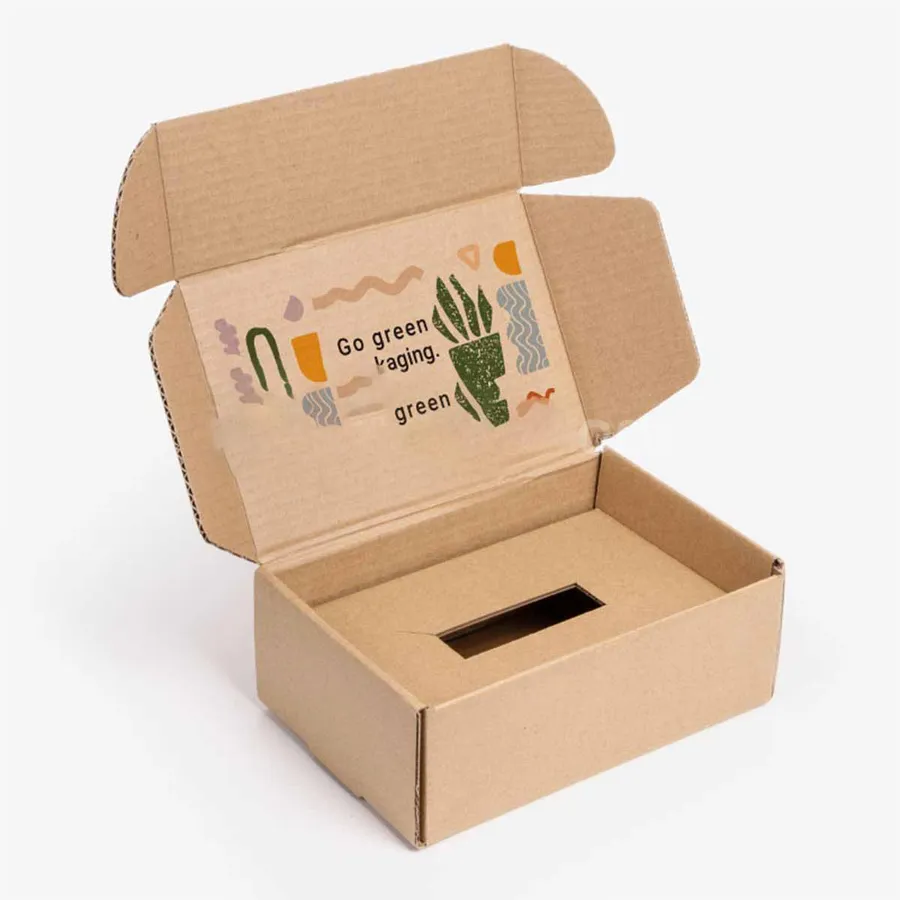
When a box needs an insert
Not every product needs one. A folded T-shirt in a snug box ships fine on its own.
An insert earns its place when items can move, touch or arrive in the wrong order. These are the signs we look for in a brief.
If two or more of these apply, plan the insert before you pick a box size. The insert decides the inner dimensions, not the other way round.
If none apply, a well-sized empty mailer may be all you need. We will tell you honestly when an insert adds cost without adding protection.
- Two or more items that could knock into each other.
- Glass, ceramic or anything with a fragile neck or handle.
- A product much smaller than the smallest sensible box.
- A kit where the order of items tells a story.
- A set the customer will keep and reuse as storage.
- Loose fill that customers complain about spilling.
The five insert types we cut most
Each insert type solves a different problem. Most projects use one, and some combine two.
The table lists what each type holds well and the material we usually suggest for it. Your quote confirms the final build.
If you are unsure, send photos of the products laid out as you picture them. We will suggest a type on the proof.
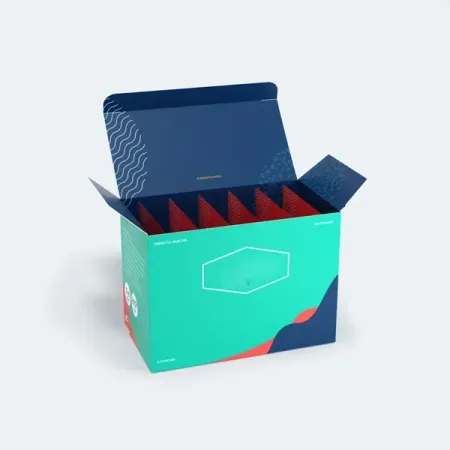
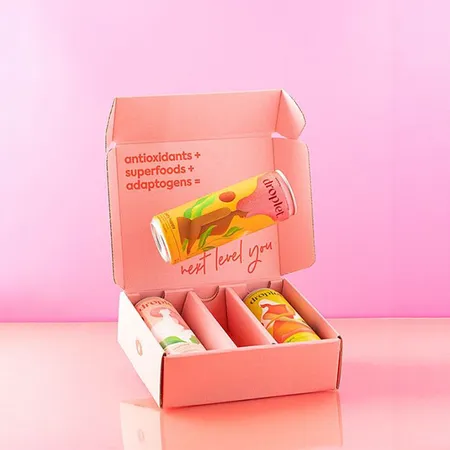
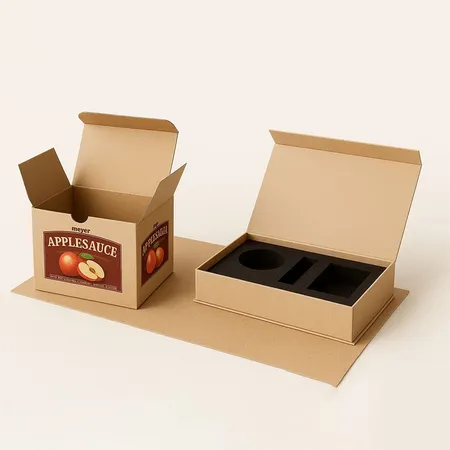
Cavity inserts are the most precise. Divider grids are the most flexible, because one grid can take several bottle shapes of a similar width.
| Insert type | Holds well | Usual material |
|---|---|---|
| Die-cut cavity | Bottles, jars, devices, tools | Corrugated for weight, paperboard for light items |
| Slot insert | Cards, phone cases, flat tins | Paperboard |
| Divider grid | Rows of vials, candles, bottles | Corrugated |
| Raised platform | One small item shown high in the box | Paperboard over a folded base |
| Lid card | Instructions, thank-you note, booklet | Paperboard |
Paperboard or corrugated insert board
Paperboard inserts are thin, clean and print beautifully. They suit light items such as cosmetics, cards and small accessories.
Corrugated inserts are thicker and absorb knocks. They suit heavier or fragile items, and cavities can be deeper.
The insert does not have to match the mailer board. A corrugated mailer with a printed paperboard insert is a common pairing.
Weighing the two for the outer box too? Our corrugated versus paperboard comparison sets them side by side.
Heavier kits sometimes mix both. A corrugated base tray carries the weight, and a printed paperboard card sits on top as the show layer.
Finger notches, pull tabs and lift ribbons
A tight cavity needs a way to get the item out. Without one, customers dig at the board and tear it.
A finger notch is a half-moon cutout beside the cavity. It is the simplest fix and costs nothing extra to cut.
A ribbon under the item lets the customer lift it like a drawer. It suits jewelry, watches and anything shown on a platform.
For stacked layers, a pull tab on the top insert lets the customer lift the whole tier to reach the layer below.
Raised platforms suit our display mailer boxes for counter use. They lift one item into view.
Ask for notches on the long side of a cavity, not the short end. A grip on the long side lifts the item without tilting it.
Printing on the insert itself
A plain insert is perfectly fine for protection. Printing it is about the moment the lid lifts.
Full-color insert print can name each item beside its cavity. That helps with kits where customers might miss a small piece.
A single brand color across the insert is a middle option. It looks finished without adding much to the quote.
Our guide to planning the unboxing order shows where printed inserts make the biggest difference.
Insert print also helps your packers. A small item name beside each cavity makes a wrong pick obvious before the lid closes.
Choosing the mailer style around the insert
The insert decides the box depth, so we design the two together. The mailer style then decides how the customer opens it.
A roll end tuck front is the most popular pairing. The lid lifts in one motion and reveals the whole insert at once.
A tuck top box suits tall, upright items in a single row. A self seal strip suits brands that want a quick close at the packing bench.
You can compare every closure in our full range of mailer box styles before you choose.
Common insert mistakes we catch at proof
Most insert problems come from guessing a size. They are easy to fix on the proof and expensive to fix after printing.
Measuring a bottle without its cap is the most frequent one. The cap then hits the lid and the box will not close.
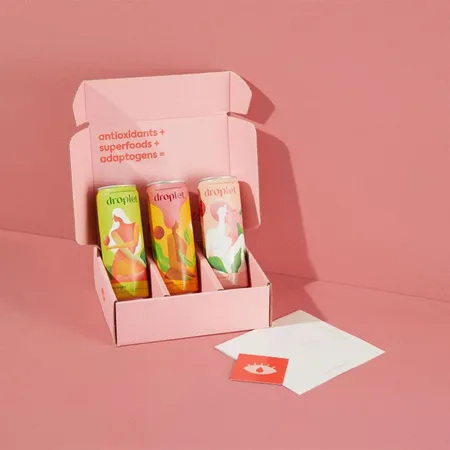
Forgetting the thank-you card is a close second. A lid card slot solves it, but it has to be planned in from the start.
Packing a kit in a different order from the insert layout also causes trouble. Brief your packing team with a photo of the approved proof.
Choosing a box size first and the insert second is another common slip. Our mailer box sizing guide explains why inner dimensions come from the contents.
Inserts for subscriptions and changing kits
Subscription boxes change contents every month, which makes a fixed cavity risky. A divider grid or adjustable platform copes better.
Another approach is one printed mailer with two or three insert designs. You swap the insert to match the month without reprinting the outer box.
Brands running monthly kits often pair this with our custom subscription boxes for monthly kits to keep the outside consistent.
Seasonal kits benefit from the same trick. A holiday insert with a festive print can go into your standard box for six weeks, then retire.
Ordering, proofing and delivery
Your free digital proof shows the mailer and insert drawn together, with every cavity measured. Revisions are unlimited.
Production starts after approval and takes 4–6 business days. Boxes and inserts ship flat together in 2–3 business days, free to the US, UK, Canada and Australia.
Prices start from $0.30 per unit, and the insert type and material are priced into your quote. You can begin with our insert box quote form.
Inserts are measured against your item list on the proof. If a product changes size before printing, send the new numbers and we redraw the cavity.
Assembly at your packing bench
Inserts arrive flat and fold into shape in seconds. Most need no glue or tape.
Fold a few samples first and time how long each one takes. That helps you plan staff hours for a large send.
Questions about folding or fit can go to (503) 461-4788 or info@shopmailerboxes.com.
Store flat inserts with the mailers in a dry room. Damp corrugated softens, and a soft cavity wall loses its grip on the item.
Our return policy for misprinted boxes sets out the 10 day window in full.